Build a Smart Bookmarking Tool with Rust and Rocket
June 3, 2020
By Joe Previte
One of my favorite tools that exists internally is our smart bookmarking tool commonly referred to as “bunnylol.” Originally named bunny1 and open sourced, it’s what we use to navigate across all tools, wikis, knowledge bases, and everything else one might use working at Facebook.
An example of a bookmark I use often is the cal command. I can type in the browser cal and it will take me to our internal calendar tool. Another example is the wiki command, which I can use to search our internal wiki pages. I type in wiki followed by the name of something I’m looking for and it will provide search results for wiki pages that match what I’m looking for.
As you can imagine, it’s immensely helpful! It also provides a way for us to not only bookmark things like the calendar, but also do things like search wikis using the provided queries. Talk about smart bookmarks, eh?
Today, I’m going to show you how to build a simple clone of bunny1 using Rust and Rocket (a web-framework for Rust). The original implementation is written in Python as a web server. We’re going with Rust because it’s:
- Fast
- Type-safe
- Fun to write
- Well-documented as a language Let’s get to it!
note
If you prefer learning by watching, you can follow along in the video series on the Facebook Open Source YouTube channel.
Building the App
Before building the app, I’ll cover how it will work and the prerequisites for following along. After that, I’ll jump in and go through each step before setting it up for production.
How will it work?
Starting from a high-level, the app will work something like this.
- Open browser
- In address bar, type a keyword
- App will redirect if keyword matches one of the commands
Say for instance I was using Firefox and I had a command gh
- Open Firefox
- Type in gh facebook/react
- Redirects to https://github.com/facebook/react
Here is that flow in action:
I want to dig more into the technical details of this approach. I can achieve this by building a basic web server app that listens for requests and redirects them based on if it matches specific criteria. I am not building a client-side app because the only functionality I need is a redirect so it makes more sense to be built as a web server.
Using the same example, the application logic will flow like this:
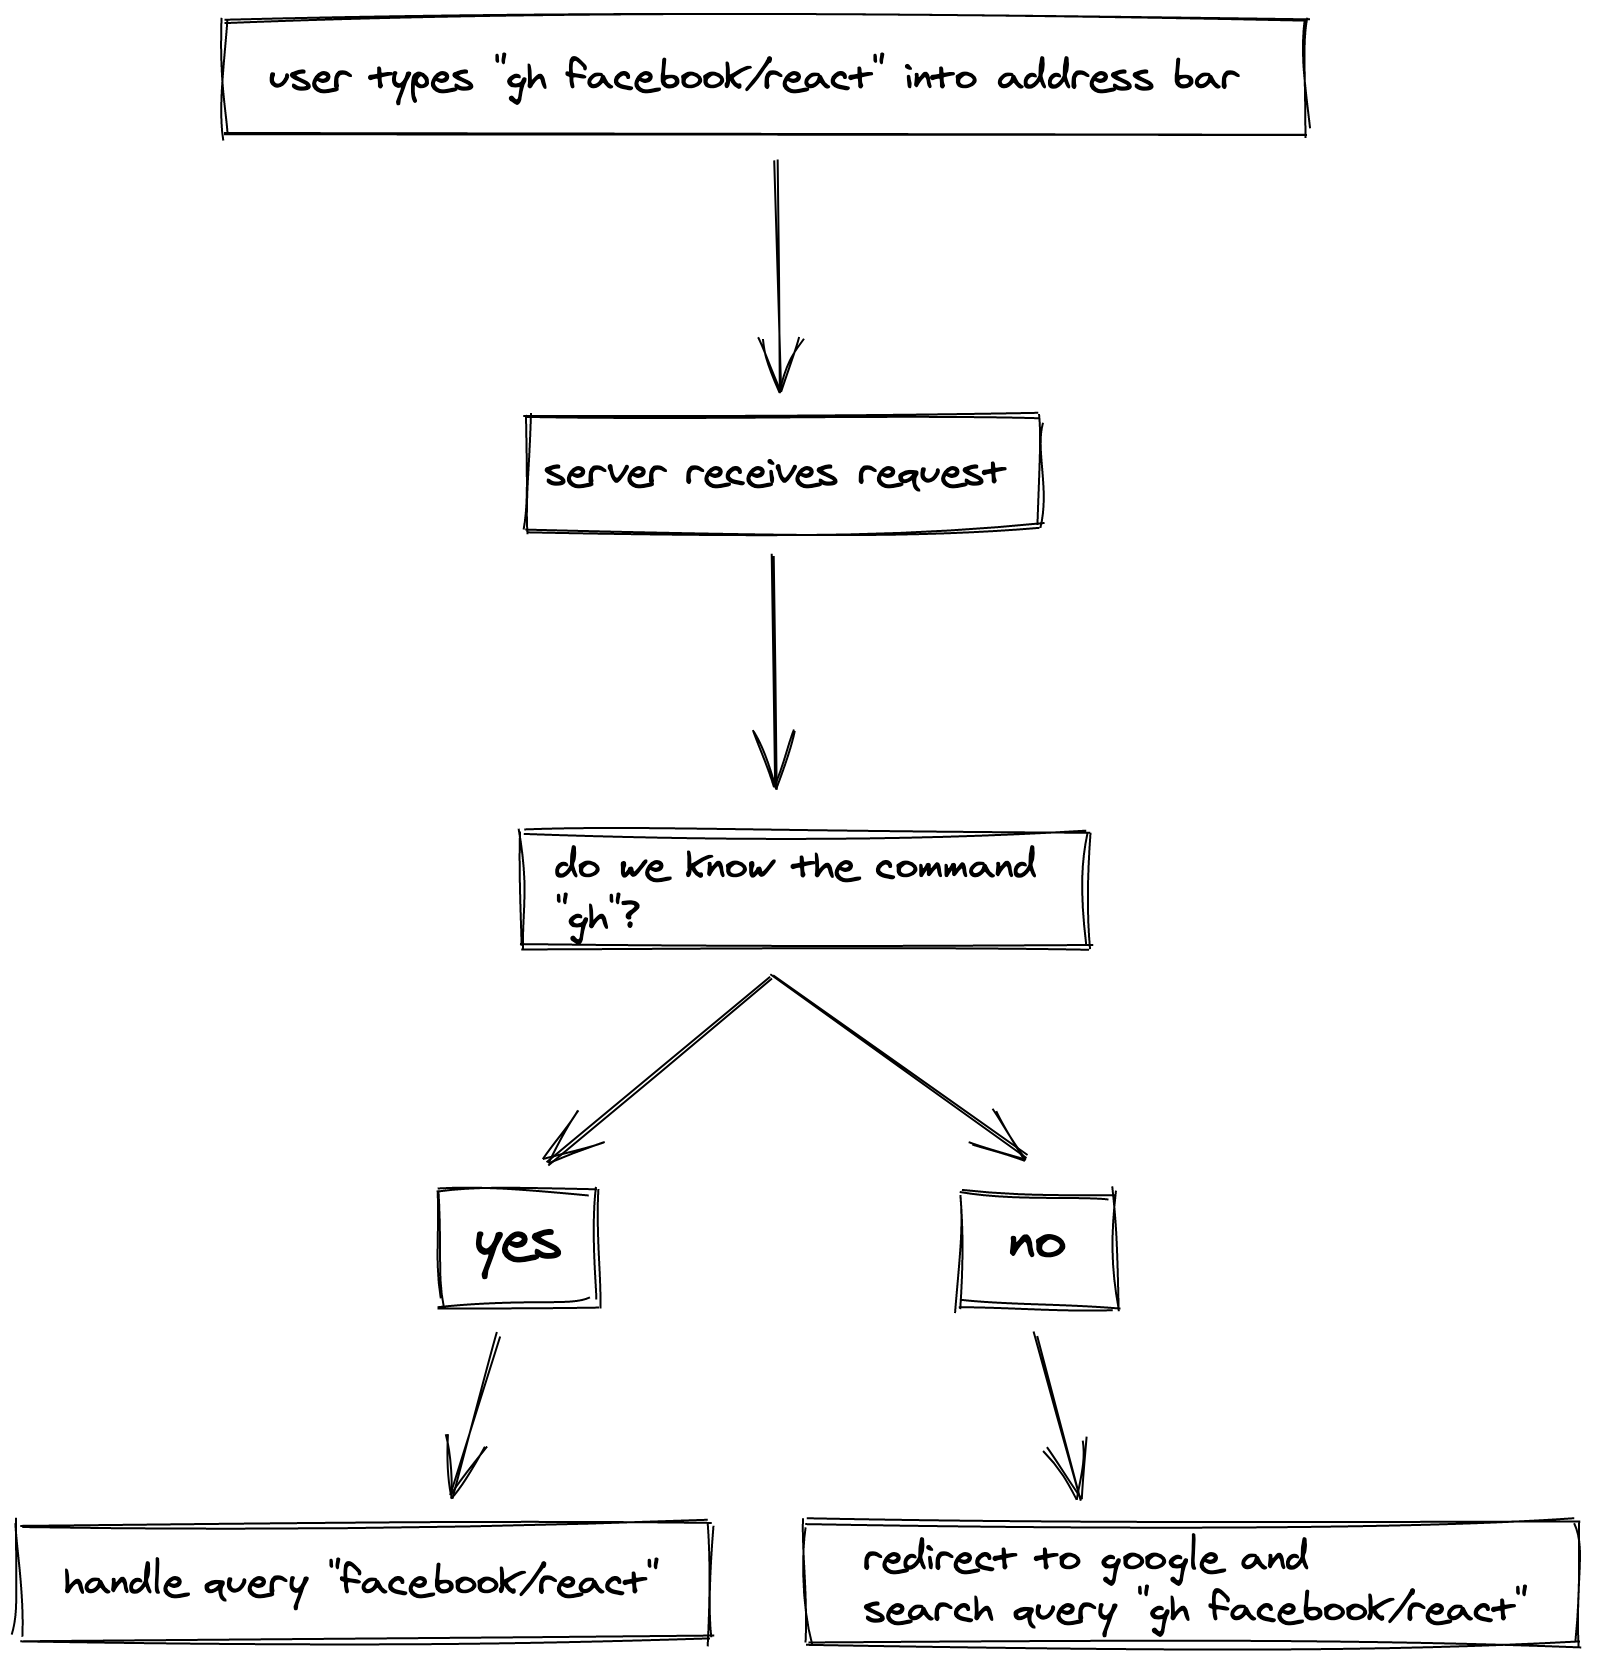
I will use a custom search engine which will allow me to connect the address bar to my own search engine. With the basic flow down, I am ready to move on to the next step!
Prerequisites
In order to start writing the Rust application, I will need to do a few things:
- Install Rust
- Switch to Nightly Rust
- Set up VS Code for Rust Test Rocket with Hello World
I will walk through each of these.
Install Rust
To install Rust, I will use a tool called rustup. You can install it by running the command:
This will install rustup which is used for installing Rust and staying up to date with different versions of the language. After you run it and follow the instructions, you should have Rust installed.
You can double-check by running:
Cargo is the official Rust package manager and we will use it to compile, build and run our Rust code.
Switch to Nightly Rust
Rust has three release channels:
- Stable
- Beta
- Nightly
The stable build is what most people use. I am using the nightly version because Rocket, the framework I’m using, uses “Rust's syntax extensions and other advanced, unstable features.”
You can change this by running the command:
You can always change it back to the stable version by running: